Linux photo management - Piwigo
Linux photography series
- Rant about my first impressions and problems letting old habits go.
- Round 1 is about my first raw edits using Darktable.
- Round 2 discusses managing the developed pictures with Digikam.
- Round 3 focuses on exporting images from Digikam and publishing them in a gallery.
Piwigo photo gallery
There are a lot of different image gallery solutions out there. I tried a few of them. Finally after gallery 3 shut down, I moved to Piwigo as it was integrated to Lightroom with an additional plugin. This integration worked quite nice and made it easy to publish the final images. It is a great gallery with a lot of extensions like download-plugins, multilanguage and image metadata support, comments and many more. It also is integrated with some 3rd party tools and has a large community supporting it.
Digikam and Piwigo
Now without the integration of Piwigo in Lightroom I looked for something similar in Digikam. Digikam supports the Kipi-Plugins that may be used to export and / or import from various targets.
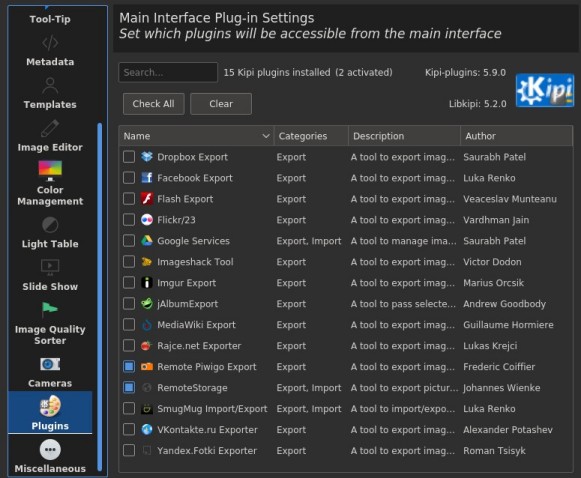
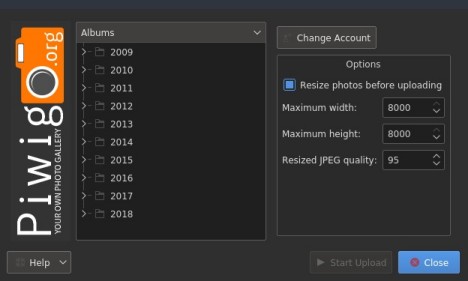
With the Piwigo plugin it is really easy to export pictures directly to a Piwigo album. When exporting for the first time, the plugin asks for the url, username and password of the target site. The second step reads all albums from the gallery and provides a tree where the target album can be selected. It is possible to resize the images. The resize option will convert the images to jpg. The last account is saved and automatically reused on the next export. A click on “Start Upload” initializes the conversion and upload of the images.
There are some things I do not like so far:
- I did not see a way to store more than one account for easy switching
- The upload process is running in the foreground and does not allow to use Digikam
- I can not queue multiple uploads to different albums
Workflow - round 3
Here are the additional steps added with the exporting tasks.
- See round 1 for Darktable and download from cf-cards
- See round 2 for Digikam
- Create the albums within Piwigo using the administrator / user account
- Select the pictures to upload
- Goto “Export -> Export to Piwigo”
- Enter credentials if running the first time
- Change the account to a different location
- Enable resize with proper numbers and quality
- Click “Start Upload” to publish the images
This works really well and publishes the images on the site quite fast.
One short notice: The plugin does not allow you to upload an image if it already exists. In this case, you will have to delete the image from within the Piwigo administration area.
wrap-up and outlook
So for now I have all personally required steps up and running. I have everything organized an know what to find where. I also support all exporting stuff as well and integrated my Piwigo installations. Probably this series will go an as I progress in my Linux photo edit and management skills. There is a lot more to discover like Gimp etc.